
 |
| Originally uploaded by literarytease |
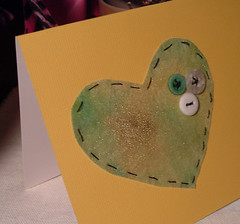
I followed this wonderful tutorial by Kelli Nina Perkins to create dyed non-fusible interfacing, even though I didn't know what I was going to do with the interfacing once it was done. So far, I've used it to make super cute fabric beads (tutorial coming soon!) and this fun Valentine's Day heart.
It's simple, but sweet, and, best of all, only took about 10 minutes to finish. (Don't worry, I put a lot more time into the accompanying gift!)

It's very simple to make your own.
You'll need:
dyed interfacing, or, if you don't want to try that, any scrapbooking paper or fabric
needle and thread
scissors
blank card
buttons
Simply cut the shape of your choice out of the fabric/paper. I did a heart, but you could do a star, a bell, a ship, or something else entirely.
Sew the shape to the card. You could, if you wanted, use your needle and a cutting mat to punch holes around the perimeter before you start to sew, which would probably make things much easier, but I just held the card up to a sunny window in order to see where to bring the needle up from the back.
I didn't knot the end of the string either. I left a long tail, did the first couple stitches carefully so as to not pull it through. When I finished, I tied the ends together in a double knot.
Sew on buttons or other decorations. (Ideas: sequins, charms, shrinky dink pieces)
You can make this card look finished on the inside by cutting a piece of paper to fit and using gel medium to coat the back of the stitching and covering them with the paper. Another thing that would be cute would be to cut a piece of vellum the same size as the card and sewing it in with a pamphlet stitch.
0 comments:
Post a Comment