30 April 2011
Congratulations Giveaway Winner
Via a drawing on random.org, the winner of the $25 gift certificate giveaway is #12, or Cathey, irishdancer2459. Please contact me by Monday at 5 PM to claim your prize. Thanks to everyone else for entering! Don't feel bad! You can have a free pocket mirror just for visiting my blog. Enter the coupon code: FREEMIRRORMAY when you check out from Literary Tease, and you'll get a free pocket mirror of your choice from my shop + 1% off your entire purchase. Please don't enter the mirror in your cart -- instead, leave me a message to seller telling me the mirror you'd like to receive for free.
Got giveaway fever?
Here are some other giveaways taking place right now:
Win a stash bag of cute fabric from Fairy Face Designs.
Win an awesome Elmer's gift pack from The Path Before Me.
28 April 2011
Found Poetry: Special Needs Lizard
I'm preparing for a move into a new and smaller apartment, which means that I have to destash EVERYTHING! I'm making huge piles of stuff to donate, stuff to sell, and stuff to throw away. As I was cleaning, I came across this notecard that features a poem that I wrote at some point, who knows when. I rarely write poems, but I usually like the ones I do write. I'm pretty sure it was inspired by Kat, who always liked to bring home animals to the apartment she shared with Mel. I figured I'd share it here then I can throw the notecard into my recycling bin. So here goes:
Special Needs Lizard
by Moira
Unloved by the child whose Christmas was gay,
Missing an eye, part of an ear and its leg,
Hot sand rehabilitation on a Saturday night.
When the lizard ceases,
as it surely will,
there will be another in a short line of scaly others,
each homelier than the last,
needing religious devotion,
and plenty of fresh flies culled by hand,
from the sweaty desert heat.
The flies circle her skirts,
pulsing purple, turquoise on fire,
& the bells of a million stars,
twinkling at her heels.
Swirling, she clucks and coos in psuedo-lizard tongue,
and, loves, without question,
the beast.
25 April 2011
Random Musings: World's Smallest Book
 |
| Tiny books, coptic-stitch, made by me |
 |
| Second book - 2.5 inches x 2 inches |
 |
| Third book - 2 x 1.25 inches |
 |
| Fourth book - 1.25 inches x 1 inch |
 |
| Coptic-stitch bound |
Still, despite being very small, this book is giant compared to the tiny book owned by Mark Palkovic. His tiny volume .9 x .9 millimeters. You read that right. Millimeters. Not centimeters. Millimeters. Go, right now, look at a ruler to get a sense of just how small that is. How would you even look at it? Apparently, only 100 copies of the book were made, and I just bet that over half of them were lost or accidentally inhaled! In fact, the book is so small, that Palkovic keeps a larger copy of the book around to show people:
Guinness World Records has confirmed that Palkovic is the owner of the smallest book in the world. Palkovic's book, Chekhov's Chameleon, measures just .9 by .9 millimeters, not much larger than a grain of salt. Amazingly, this miniscule book has 30 pages and three color illustrations. The print cannot be read by the naked eye, but Palkovic keeps another larger copy of the book, still measuring just a tiny 2 by 1.8 centimeters, nearby.
As for the tiniest book in the world, Palkovic does not just let it sit in its decorative collector's box. Even though it's as small as a little grain of salt, he has to take it out and look at the book, bound in gold and silk. "If you ever get a miniature book, you will never lose it," he says. "You may not be able to find it for awhile, but you'll come across it again. You just tend to put it somewhere safe because it's a treasured little thing."
24 April 2011
Random Musings: World's Largest Book
For some reason, last night as I was falling asleep, I started wondering about the world's largest book. I have this huge board, 4 foot by 8 foot, in my studio and I was imagining how I would make it into a coptic-stitch bound book using rope. (Books were on my mind, I think, because I made two finished journals and two almost finished ones yesterday.) I asked Nick how big he thought the world's biggest book would be, and he, half asleep, muttered a number that seemed way too small. No, I said, I bet it's huge. Well, he said, I'm sorry, but I'm too tired to look. I wasn't going to get up to research it either, and figured I'd probably forget all about it by morning. And I did. But Nick didn't.
So what do you think? How big is the world's biggest book? According to Nick's research, this is it:
 |
| Source: http://www.luxuo.com/events/worlds-biggest-atlas-book-fair-frankfurt.html |
Second in line to the atlas is Bhutan, a book published by Michael Hawley of the MIT Media Lab in 2003.
 |
| Source: http://www.lib.washington.edu/specialcoll/exhibits/bhutan/book1.jpg |
"Bhutan: A Visual Odyssey Across the Last Himalayan Kingdom" weighs in at more than 130 pounds and stands at five by seven feet, nearly as big as a Ping-Pong table. The book features more than 100 pages of spectacular images of a country often referred to as "the last Shangri-la," and showcases a variety of new digital, photographic and printing techniques.The rest of the MIT press release details the making of the book and is definitely worth a read.
The third largest book, 2nd largest atlas, is the Klencke Atlas, which was presented to Charles II of England on his restoration.
 |
| Source: http://www.guardian.co.uk/books/2010/jan/26/klencke-atlas-british-library-exhibition |
Here's an interesting entry on Wikipedia about the world's largest stone book, which stands upright and resides in the Kuthodaw Pagoda in Myanmar. It's not the type of book I was thinking about when I thought about giant books, but it's still worth a read! (The entry I mean, not sure about the book!)
Stop back tomorrow and we'll talk about books at the opposite end of the spectrum! How small do you think a book can be?
23 April 2011
Craft Serendipity: Freezer Paper Journal Covers
Today I'm going to give you the basics on how to make this:
 |
| Freezer Paper Journal Cover |
As I was working on my studio tasks for today, I needed to clear my craft table for another project. I looked at the sheet of freezer paper and decided it was much too pretty to throw away. It's covered in bright spray paint splatters, messy paint drips and splatters, and shiny streaks of gel medium, and it's beautiful. I put it off the the side and once my table was cleared, I started on my first project of the day: making a canvas-bound art journal for myself.
Nancy Rafi, of Rafi Designs, makes gorgeous hard-bound journals and I've been wanting one of my own for months. Hers are beautiful, but I wanted a nice blank journal that I could decorate myself. Plus, I like working in 8 x 10 size, and hers are 8 x 8. When I asked Nancy about her source for the book cloth tape, the only thing I didn't have on hand in my studio, she was kind enough to send me a sample. You'll be seeing more of my journal soon, I'm sure, but here's the blank journal I made:
After making the journal, I had leftover strips of Fabriano Artistico paper which were just the right size to make mini journals, 5 x 6.25 inches. I didn't have canvas in the right size and didn't feel like cutting any boards down to size, so I needed something else to make the cover. I turned around, looking for inspiration, and I saw the freezer paper. Perfect!
I tore pieces of freezer paper to fit the cover and headed to my sewing machine to sew the paper onto the first folded page in the journal. Just before I started, I realized that I'd probably want to cover the stitches on the back of the cover and that using the Artistic paper was probably a waste for the cover. (I love Fabriano Artistico hot press 140 lb watercolor paper, but it's expensive, for paper: $4 a sheet.) Instead, I came back to my studio and grabbed a few 8.5 x 11 sheets of cardstock from my printer. This actually turned out to be a great idea!
I used a zigzag stitch to sew the freezer paper right in the center of the page. I considered trying to line up the edges, but it's actually better to have some room around the edges. You can't pin the paper into place, so it might move on you when you first start. I sewed around all the edges, overlapping a little bit at the end. Be careful to stay on the freezer paper when you are stitching. You'll be trimming this later and won't want to accidentally cut the stitches.
 |
| Accidentally beautiful scrap! |
 |
| This is pre-rice paper but shows how the journal will work. |
[Note: I always sew my pamphlets so that the tied ends are on the outside. This way when I'm done working in the journal, I can add beads or other adornments! I don't recommend adding adornments until after you're finished working inside the journal because the beads tend to fall off and/or get in the way.]
22 April 2011
Giveaway: $25 Gift Certificate to Literary Tease
Maybe you've been eyeing up the items in my shop, Literary Tease, but you haven't bought anything yet. Or maybe you have already made an order, but you want to try a new product. Or maybe you need an awesome gift for your Mom this Mother's Day, but you have no idea what to get her!
Enter this giveaway for your chance to win a $25 gift certificate to Literary Tease. You can use the certificate to buy great Literary-themed jewelry and accessories for yourself or your friends. The certificate is valid for anything in the store and, yes, it can be applied towards your shipping costs, too. In fact, if you want a custom order, such an a locket with your choice of word or picture or a custom pocket mirror with your own photograph or drawing on it, you can your your certificate for that, too. Finally, if you'd like to get a gift for someone, you can give them the gift certificate so they can choose their own present. (They'll just need to let me know who gave them the certificate, or, conversely, you tell me who will be using it.)
You get up to 6 entries:
1 entry - leave me a comment and tell me your favorite item in the shop and what you like about it
1 entry - leave another comment and tell me what you'd like to see in my shop in the future
1 entry - like Literary Tease on Facebook and leave a comment telling me you did
1 entry - follow Crafty Moira on blogger and leave a comment telling me you did
1 entry - tweet about the contest and leave a comment telling me you did
1 entry - tell your friends on Facebook about the contest in your status and leave me another comment
(Note if you already follow my blog or like me on Facebook, just leave me a comment telling me your already do!)
Your last day for entries is one week from today: 5 PM on Friday, April 29th. The winner will be picked using a random number generator and posted here on May 1st.
(Note: I heard that some people might be having trouble leaving comments. If that's the case for you, please send me an email at moira{dot}richardsonATgmail and I will enter you manually!)
21 April 2011
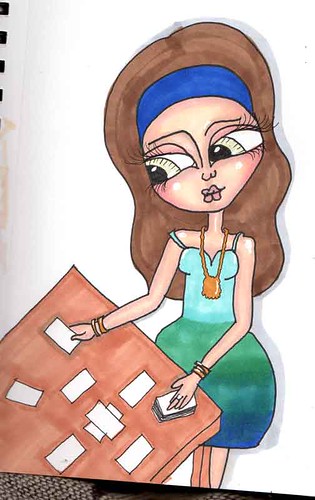
Tarot Girl
copyright 2011 moira richardson
I apologize to anyone who's completely bored with me posting drawings this week! I'm admittedly obsessed! Something clicked in my head recently and now I'm a drawing fiend.
I started my current journal on April 11th. It has 60 pages, one of which I used to make a marker color chart, another which I tore out to use underneath drawing to prevent marker bleeds. It's now April 21 and I have only three blank pages left in my book! Wow! Granted, most of my sketches are one sided, but that's still a crapload of sketching in ten days!
For this lady, I used a Copic Multiliner Pen .8 to outline the girl, .3 to outline the cards and necklace. Forgot to color the backs of the cards before I scanned! I am using Shinhan Touch Twin markers for shading, a white Uni-Ball Signo pen for highlights, and .3 multiliner pen for eyelashes.
20 April 2011
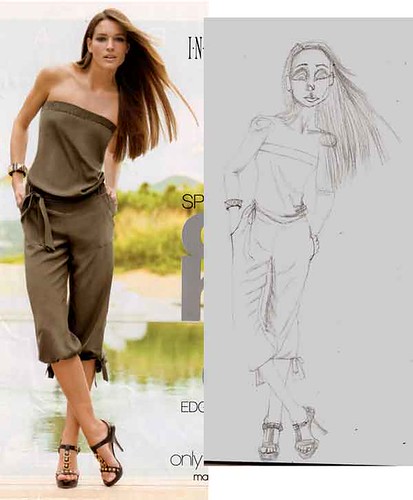
magazinedrawing2
Here's another sketch from a magazine page. I didn't ink this drawing yet, so it looks a little faded since I don't know how to scan pencil lines properly! I'm having fun drawing from magazines!
I'm obsessed! My newest sketchbook has only 6 pages left... and I started it on April 11th! Not to worry, I already have my next sketchbook sitting on my desk! :) I'm using a Canson Mixed Media sketchbook, 7 x 10.
19 April 2011
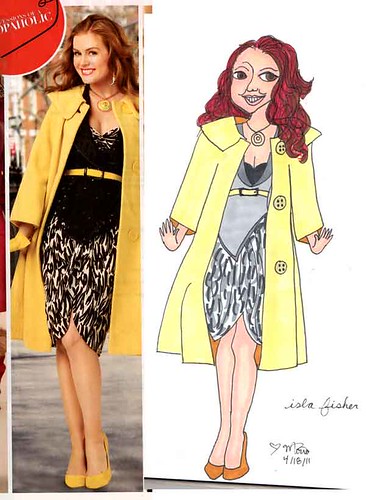
Magazine drawings - Isla Fisher
I decided that a good way to improve my drawing skills would be to find inspiration in fashion magazines. I tore out a bunch of pages from an old issue of Glamour. I was originally looking for pictures of feet, so I could work on drawing shoes, but I discovered that there weren't actually that many feet pictures in the mag! Instead, I found lots of fashion inspiration.
I love the yellow coat that Isla Fisher is wearing in this photograph as well as her flirty position. The proportions aren't quite right on my drawing, but I'm psyched at how much my drawing looks like the original. A few months ago, I would have sworn that I couldn't draw worth a damn and now I'm carrying my sketchbook everywhere I go! Joy!
What do you think? How did I do?
16 April 2011
Purple Dreams
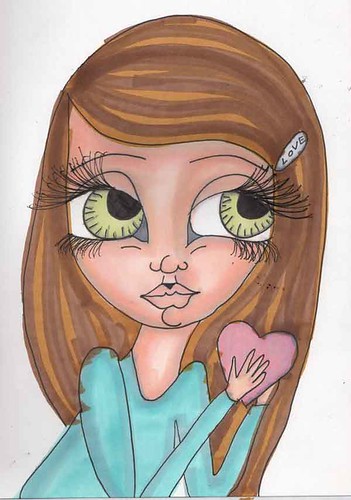
Here's my latest girl drawn with ShinHan Twin Touch markers. I'm loving these markers! I already went and bought another dozen, which means I have 26 different colors on hand. These should keep me happy for a while, but I'm already thinking about the florescent markers for an eighties girl... hmm...
15 April 2011
Flapper Girl
I'm totally addicted to drawing and coloring these ladies right now! I did this one and another one last night. I'm about to go draw more now. Fun!
14 April 2011
Queen: ShinHan Twin Touch Markers, Part Two
ShinHan Twin Touch Marker Review: Copic Marker Substitute
The main difference between the Copic Sketch and the Twin Touch markers that I see is that the broad nib on the Twin Touch markers is wider than on the Copic Sketch markers. The brush tip is less "brushy" and more of a fine point. This is actually something I like better, since I have a harder time getting the line I want with the Copics. You can vary the line more with the Copic, so if that's a feature you like, you might miss that with the Twin Touch markers. I've heard that the Twin Touch markers are not refillable, but since I haven't been using Copics long enough for me to have to refill those, I'm not sure I care that much about that option, at least not yet. If you want to try Copics, but can't afford them, I highly recommend you give the Twin Touch markers a try.
I wanted the markers primarily for doing skin tones on my doll drawings, so I bought these colors:
Cool Gray #1, 2, & 5
Bareley Beige 29 [sic]
Baby Skin Pink 133
Pale Cherry Pink 135
Fruit Pink 28
Blush 136
Yellow Ochre 101
Raw Umber 102
Pale Pink 9
Mauve Shadow 146
Spectrum Green 172
Pastel Blue 67
This is a good selection for shading lighter and medium skin tones. I got the blue and the green in order to be able to do eyes. I bought the shades of gray in order to add shading to any of the colors, plus I think I'll end up using them for shadows on text and other things. The Mauve shadow might seem odd, but the purply color adds warmth to the finished blended skin tone. I believe that ShinHan makes white and black markers, but Jerry's didn't have those colors in stock yesterday, otherwise I would have gotten them. I have plenty of white and black in the form of Sharpie poster-paint pens, so I don't feel like I really need them in the Twin Touch markers. You might want to add them to your list though if you don't already have other black and white options.
For paper, I am using a Canson Mixed Media sketchbook. The paper is 98 lb. I put a scrap sheet of paper behind my image for an bleed through, but I didn't get much, if any on this image.
13 April 2011
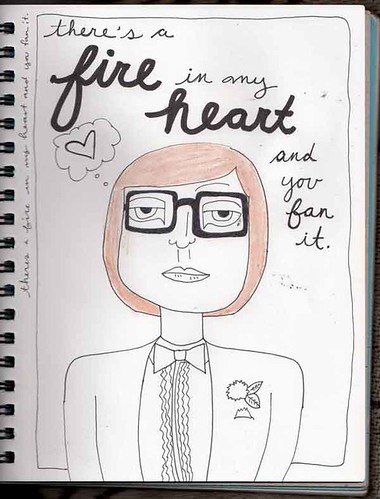
Fire in my Heart
I was really sick last week and as I was starting to feel better, I really wanted to make art. I was still too sick to sit at my computer for any length of time, but I was well enough to sit up in bed and do sketches. I was watching the Rocky Horror Picture Show when I was suddenly inspired to draw all the characters as an experiment.
This is inspired by Brad, and while it doesn't exactly look like Brad, I love the stoic expression on his/her face, like you'd never guess the passion bubbling beneath the surface.
I love how the figure looks kind of androgynous, so it's not really clear what his/her gender is meant to be. I also feel like this image is a little bit of a self portrait, but that might just be because we both have thick black glasses.
I used a Sharpie pen and watercolor crayon for the hair. I'll probably go back and finish coloring this image, but I wanted to scan it as is so I can play with it in photoshop.
Recipes: Stuffed Pepper Soup
This easy and delicious soup was my "intuitive soup" of the day yesterday. I had three lovely red peppers in my fridge and I knew that I wanted to use them to make soup. I also had leftover brown rice, so I thought, "mmm, stuffed pepper soup." Stuffed peppers are good, sure, but I love stuffed pepper soup. You get the same flavors with half the work. And, actually, half the peppers, too. (Have red peppers, but don't want soup? Try my Red Pepper Jelly recipe.)
I make all of my soup in a crockpot because I like to be able to throw all the ingredients together and walk away. A few hours later, the house smells delicious and I know soup is ready to eat. I made a batch of gluten-free English muffins to go with the soup. They aren't quite the same as "regular" English muffins, but that's okay, because they are better. They are like a cross between English muffins and biscuits, and they are so, so good. I didn't have any olive oil when I made this last batch, so I used melted butter, woohoo! They are certainly not the healthiest, but they are delicious. I can't decide which ones I like better.
On to the soup...
12 April 2011
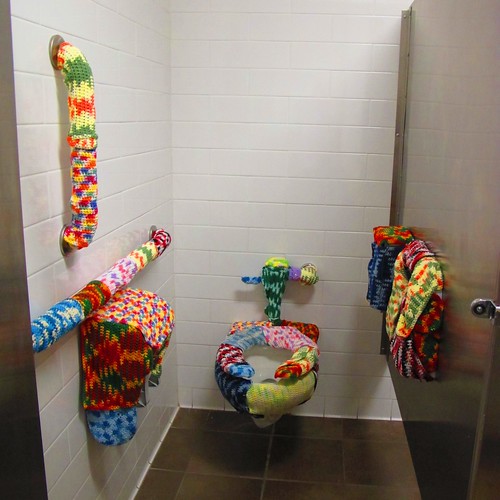
Random Art: Yarn Bombed Bathroom
10 April 2011
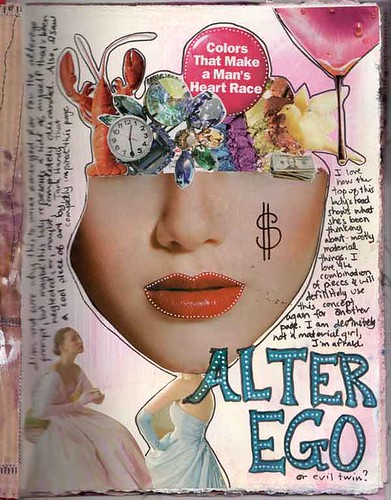
Alter Ego - Journal Page
08 April 2011
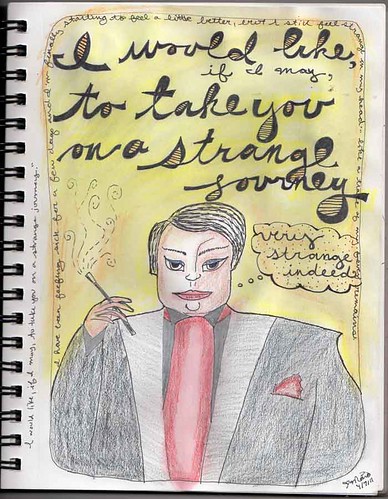
Art Journal Page: Strange Journey
06 April 2011
Postcard Swap 2011: Positive Intentions
 |
| copyright 2011 moira richardson |
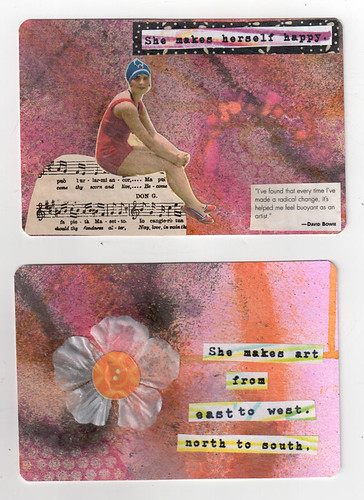
What exactly does that mean, though, "imbue with positive intentions." It wasn't like I was going to lick the postcard stamps after a particularly gleeful day, or anything that literal, rather, at the risk of sounding all new-agey, that I would simply imagine the joy that each postcard recipient would feel upon finding my little card in her mailbox. Instead of trying to decide which postcard to send in any sort of conscious manner, I just picked up the postcards at random and addressed them by going in order down the list as sent by Hanna (though, at one point, I missed someone and had to swap order... I suspect that was the universe helping me out.)
 |
| copyright 2011 moira richardson |
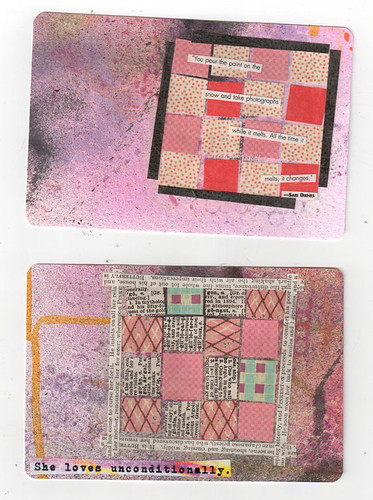
Once I had all the cards addressed and my stamps purchased by the post office, it was time to think about what I was going to write in the message part. I love quotes, so I knew I wanted to add a quote to every card, but I also know that I wanted each card to be unique, both in design and message. When I sat down to write my first card, I wasn't really sure what was going to come out, but I ended up writing a message that said something like, "Here's wishing you many happy hours of art making and joy in all that you do - love, moira".
 |
| copyright 2011 moira richardson |
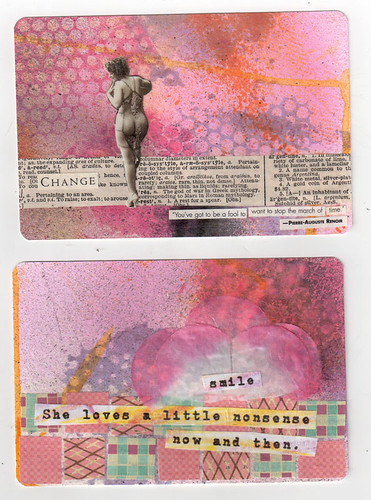
one to arrive! Everything on it spoke to me ... Change, the quote from Renoir &
Jack London, the big bottomed goddess (how did you know?)"
Recipes: Intuitive Soup
 |
| Image credit: Sydney Morning Herald |
01 April 2011
Artist Interview: Joanna Read Cotter
 |
| "Bohemian Dream" dyes on 8"x54" flat crepe silk copyright 2011 Joanna Read Cotter |
2) How long did it take for you to develop your technique?
The development is definitely ongoing. I work in a wide variety of methods, and am continually interested in learning new techniques and further refining my craft. Learning how to properly steam fix the silk dyes initially took months, and a lot of tears of frustration were shed in the beginning! It was all part of the learning process though, and it started to get me thinking more about non-attachment.
3) How much space do you need in your studio for making your scarves?
The more space, the better! I am really fortunate to have a room in our apartment that I have been able to turn into an art studio. On most weekends, I'll set up sawhorses in the middle of the kitchen to stack frames of wet silk and clear out space in the studio for more work - and I always do my ironing in our dining room, where I know the silk will have no chance of coming in contact with any dye after I've steam fixed and washed it.
 |
| "Lotus Pond" dyes on 22"x90" silk satin copyright 2011 Joanna Read Cotter |
5) What's the best part about your art?
6) What's the worst part?
This is true for a lot of artists - we tend to work a lot of very long hours by ourselves - usually in isolation, so sometimes it can feel a little lonely. This just makes me work harder to make sure I schedule in social time along with studio time - both are equally important.
7)What are your "essential" art supplies/tools/materials?
 |
| Joanna's Color Grid copyright 2011 Joanna Read Cotter |
8) What is the one tool you couldn't live without?
9) Where do you find inspiration?
Nature and imagination are definitely my biggest sources of inspiration. I love going on jogs through the woods and just taking in all the sights, smells, sounds, and feelings, and then later translating some of that experience onto silk or canvas. This has me thinking I may want to explore plein air painting more this year. I'm just so happy when I'm out in the sun and fresh air!
 |
| "Sunset Melody" dyes on 14"x72" crepe de chine silk copyright 2011 Joanna Read Cotter |
10) What artists inspire you & why?
11) What is the most rewarding part of finishing a piece?
12) How do you know when you are finished with a painting? Is it a gut feeling or something else? Artist Teesha Moore says that you should push past the feeling of thinking a piece is finished at least twice. Do you agree or disagree?
13) How does your art reflect your personality? Or... how does your personality reflect your art?
That's a great question! My painting and my personality have evolved hand in hand over the last couple of years, and I've learned a lot about myself through my art and how I react to it. I definitely have a Type-A personality, and when I first started painting on silk, I was most interested in creating tight, highly detailed work. If one little drop of dye fell on the silk in the wrong place, it would completely alter the image, and often I'd see this as really frustrating! These days, I'm much more open. I'm learning to relax and loosen my grip, literally and figuratively, and see where the process leads, rather than trying to force anything. A lot of my work still does require a high degree of focus and concentration, but having that increased awareness of the process has made each experience in the studio so much more fulfilling and meaningful. I think that my genuine enjoyment of making art is translated in my work, and I want it to be felt and experienced in some way by the viewer - uplifting and inspiring them.
 |
| "Spring is in the Air: Ethereal Roses" dyes on 22"x90" silk chiffon copyright 2011 Joanna Read Cotter |
I have been making art my entire life. I went to an after school art program in my middle school years which had a really big influence on the path I chose in highschool, where I took every art class imaginable. l had an outstanding art teacher who for four years, really went above and beyond to help me create a portfolio that would get me into college and win scholarships. Thanks in part to his teaching, I attended Umass, Amherst on scholarship and received a BFA in Painting and Art History Minor. And now, here I am!
15) Do you have any all-time favorite paintings / scarves / works of art?
I have so many favorite paintings and scarves for different reasons, it's impossible to name only a few. Each piece sings to me in a different way.
16) Do you make art daily? Do you have any other daily creative practices?
I definitely am doing some sort of work with my business every single day. I am constantly recording new ideas and moments of inspiration so that I can return to them when I have the time, and I consider that part of my creative practice. My best work develops when I am able to designate long chunks of interrupted time, so the weekends are sacred for art making, and I try and take care of all the other parts of running my business (writing, shooting photos, developing new marketing material, steaming/washing/ironing, inventory, long range planning, number crunching, web analytics, mailings, etc.) when I get home from my day job during the week.
17) What do you do if you are fresh out of ideas?
18) Do you have any favorite websites or resources that you'd like to recommend to others?
 |
| "Dance of the Honeybee" 12"x12"x2" hand painted silk, india ink, wax medium on panel. copyright 2011 Joanna Read Cotter |
19) Where do you see yourself and your business in the next five years?
__________
See all of my artist interviews here.


